How to Create PDF Documents from LaTeX API in n8n
Manually creating paperwork and documents often takes a lot of time out of a working week. This article will guide you through how to automate the generation of PDFs inside n8n - a popular open-source workflow automation tool.
LaTeX is a powerful typesetting system that is widely used for creating professional documents, especially in academia and publishing. The design of the documents will be defined in a LaTeX .tex template, and dynamic input data provided in a JSON will be used to customize the contents of each document as required. LaTeXLite’s API will be used to take care of the LaTeX compilation and PDF generation over HTTP request, allowing a fully cloud based workflow without the need to host and maintain your own server for LaTeX compilation.
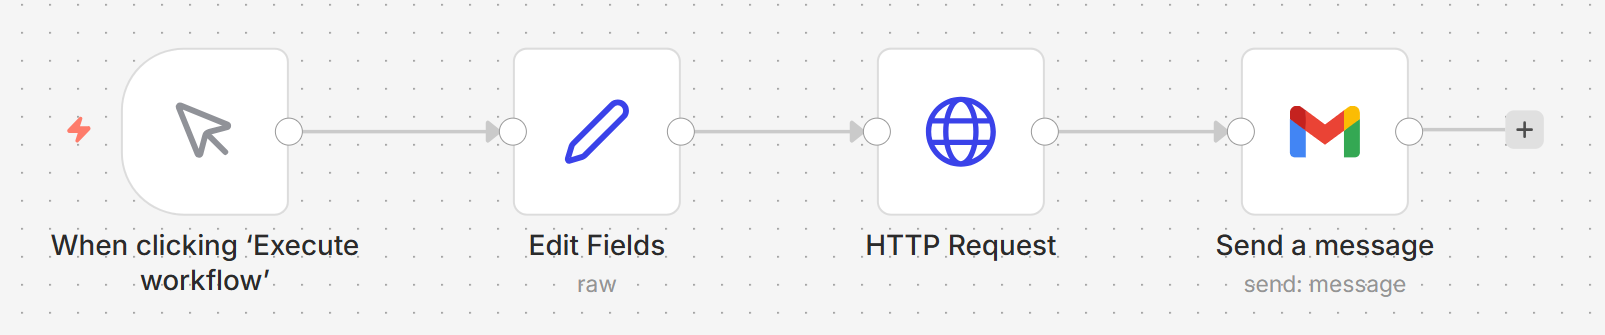
For this example, the output document will be sent to your email address as an attachment, but you can easily modify the workflow to save the PDF to cloud storage, or any other action you require. The full workflow can be seen below:
Get Your API Key
For this to work, you will need your own free demo API key, available here, and use it in place of YOUR_API_KEY in the code snippets below.
Create a trigger:
Then we can create a new workflow using a trigger node. For this example, we’ll use the When clicking 'Execute Workflow' trigger.
Define the LaTeX template and input data
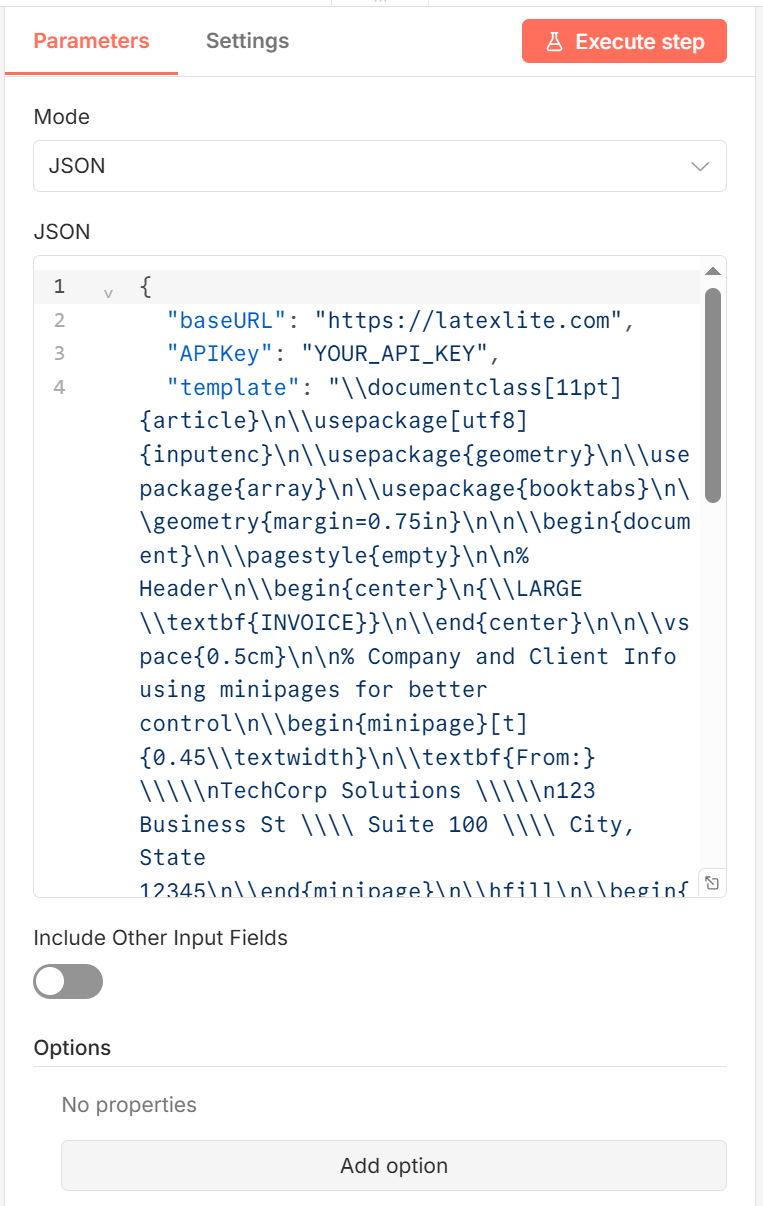
Next up, we need to define the LaTeX template and input data that will be used to generate the PDF document. We can do this by adding an Edit Fields node next in the workflow. Double click this node to open the configuration panel. In the Parameters tab, set the Mode to JSON and add the following JSON to the Values field:
{
  "baseURL": "https://latexlite.com",
  "APIKey": "YOUR_API_KEY",
    "template": "\\documentclass[11pt]{article}\n\\usepackage[utf8]{inputenc}\n\\usepackage{geometry}\n\\usepackage{array}\n\\usepackage{booktabs}\n\\geometry{margin=0.75in}\n\n\\begin{document}\n\\pagestyle{empty}\n\n% Header\n\\begin{center}\n{\\LARGE \\textbf{INVOICE}}\n\\end{center}\n\n\\vspace{0.5cm}\n\n% Company and Client Info using minipages for better control\n\\begin{minipage}[t]{0.45\\textwidth}\n\\textbf{From:} \\\\\n[[ .companyName ]] \\\\\n[[ .companyAddress ]]\n\\end{minipage}\n\\hfill\n\\begin{minipage}[t]{0.45\\textwidth}\n\\textbf{Bill To:} \\\\\n[[ .customerName ]] \\\\\n[[ .customerAddress ]]\n\\end{minipage}\n\n\\vspace{0.5cm}\n\n% Invoice Details\n\\begin{tabular}{@{}ll@{}}\n\\textbf{Invoice \\#:} & [[ .invoiceNumber ]] \\\\\n\\textbf{Date:} & [[ .invoiceDate ]] \\\\\n\\textbf{Due Date:} & [[ .dueDate ]] \\\\\n\\end{tabular}\n\n\\vspace{1cm}\n\n% Services Table\n\\begin{center}\n\\begin{tabular}{|p{0.5\\textwidth}|c|c|c|}\n\\hline\n\\textbf{Description} & \\textbf{Qty} & \\textbf{Rate} & \\textbf{Total} \\\\\n\\hline\n[[ .serviceDescription ]] & [[ .quantity ]] & \\$[[ .rate ]] & \\$[[ .lineTotal ]] \\\\\n\\hline\n\\multicolumn{3}{|r|}{\\textbf{Subtotal:}} & \\$[[ .subtotal ]] \\\\\n\\hline\n\\multicolumn{3}{|r|}{\\textbf{Tax ([[ .taxRate ]]\\%):}} & \\$[[ .taxAmount ]] \\\\\n\\hline\n\\multicolumn{3}{|r|}{\\textbf{TOTAL DUE:}} & \\textbf{\\$[[ .totalAmount ]]} \\\\\n\\hline\n\\end{tabular}\n\\end{center}\n\n\\vspace{1cm}\n\n\\textit{Payment terms: [[ .paymentTerms ]]}\n\n\\vspace{0.5cm}\n\nThank you for your business!\n\n\\end{document}",
  "data": {
    "companyName": "TechCorp Solutions",
    "companyAddress": "123 Business St \\\\ Suite 100 \\\\ City, State 12345",
    "customerName": "Sarah Johnson",
    "customerAddress": "456 Client Ave \\\\ Client City, State 67890",
    "invoiceNumber": "INV-2025-001",
    "invoiceDate": "December 15, 2025",
    "dueDate": "January 14, 2026",
    "serviceDescription": "Website Development and Design",
    "quantity": "1",
    "rate": "2500.00",
    "lineTotal": "2500.00",
    "subtotal": "2500.00",
    "taxRate": "8.5",
    "taxAmount": "212.50",
    "totalAmount": "2712.50",
    "paymentTerms": "Net 30 days"
  }
}
Note that backslashes at the start of commands in the LaTeX template need to be escaped with another backslash in the JSON (apart from \n or \t). The API key here is the demo key provided by LaTeXLite for testing purposes. For production use, you should replace this with your own API key, and replace the template and input data as required.
Send a HTTP Request to LaTeXLite API to compile the PDF
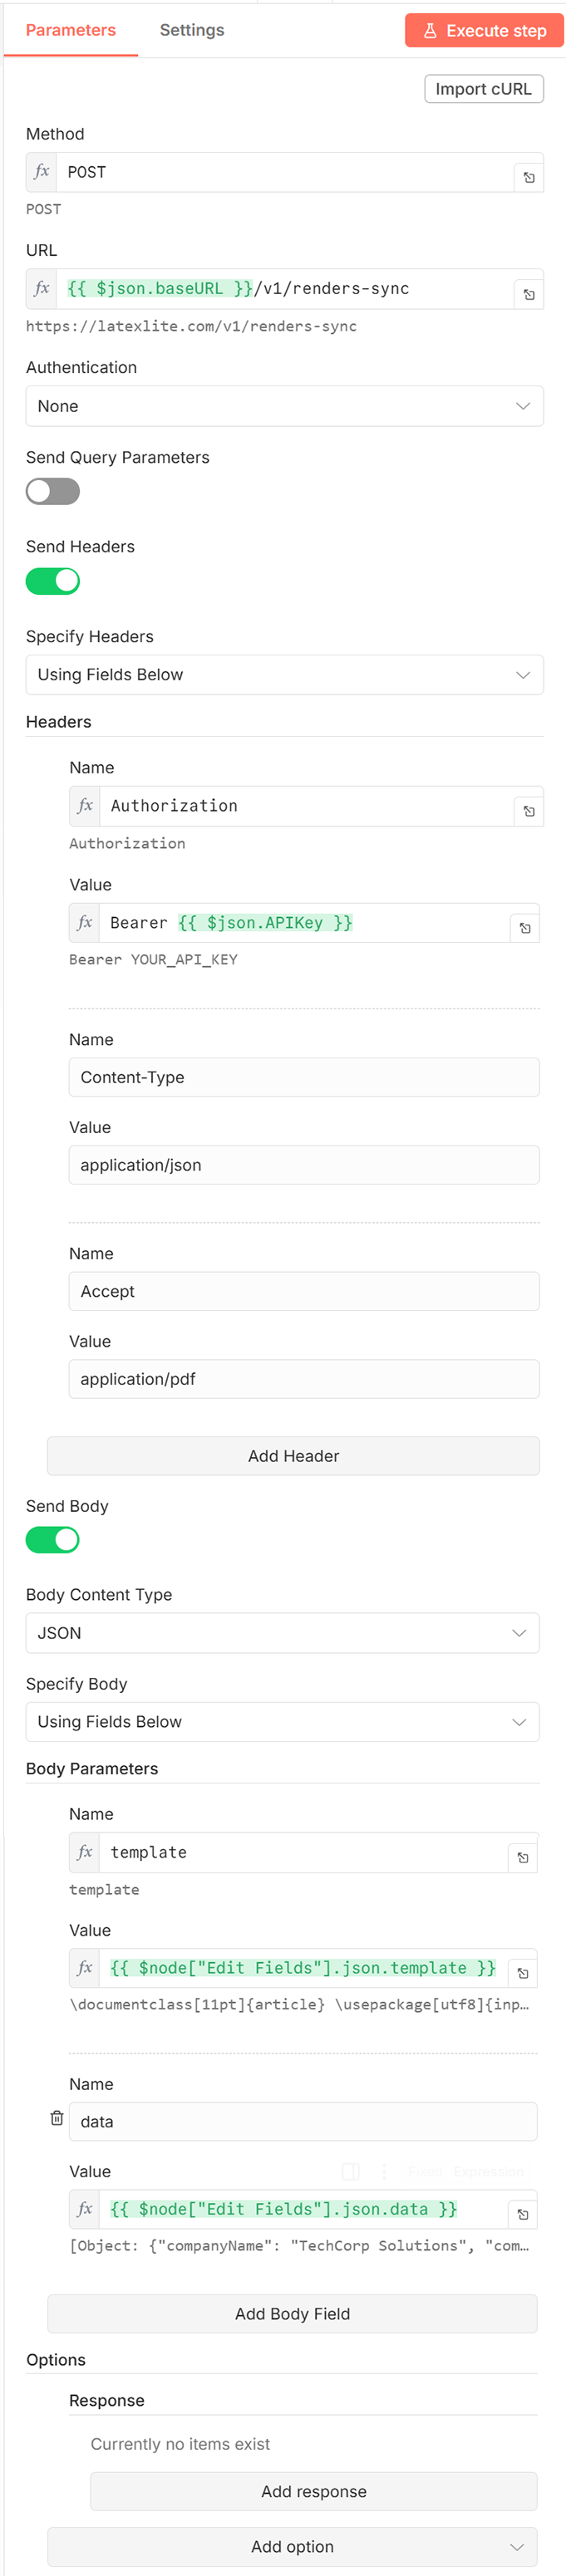
Next, we need to add a HTTP Request node to send this data to LaTeXLite’s API for compilation. Add a HTTP Request node next in the workflow. Double click this node to open the configuration panel. Set the method to POST, and set the URL field to expression (not fixed), with the Value:
{{ $json.baseURL }}/v1/renders-sync
Set the Authentication to None, do not select Send Query Parameters, but select Send Headers. Specify Headers Using Fields Below. Add one Header with the Name Authorization, and the Value (as an expression):
Bearer {{ $json.APIKey }}
This will use the demo API key provided in the Edit Fields node.
Add another Header with the Name Content-Type, and Value:
application/json
And a final Header with the Name Accept, and Value:
application/pdf
Select Send Body and set the Body Content Type to JSON. Specify Body Using Fields Below. Add a Body Parameter with the Name template, and Value (as an expression):
{{ $node["Edit Fields"].json.template }}
Add naother Body Parameter with the Name data, and Value (as an expression):
{{ $node["Edit Fields"].json.data }}
Email the PDF as an attachment
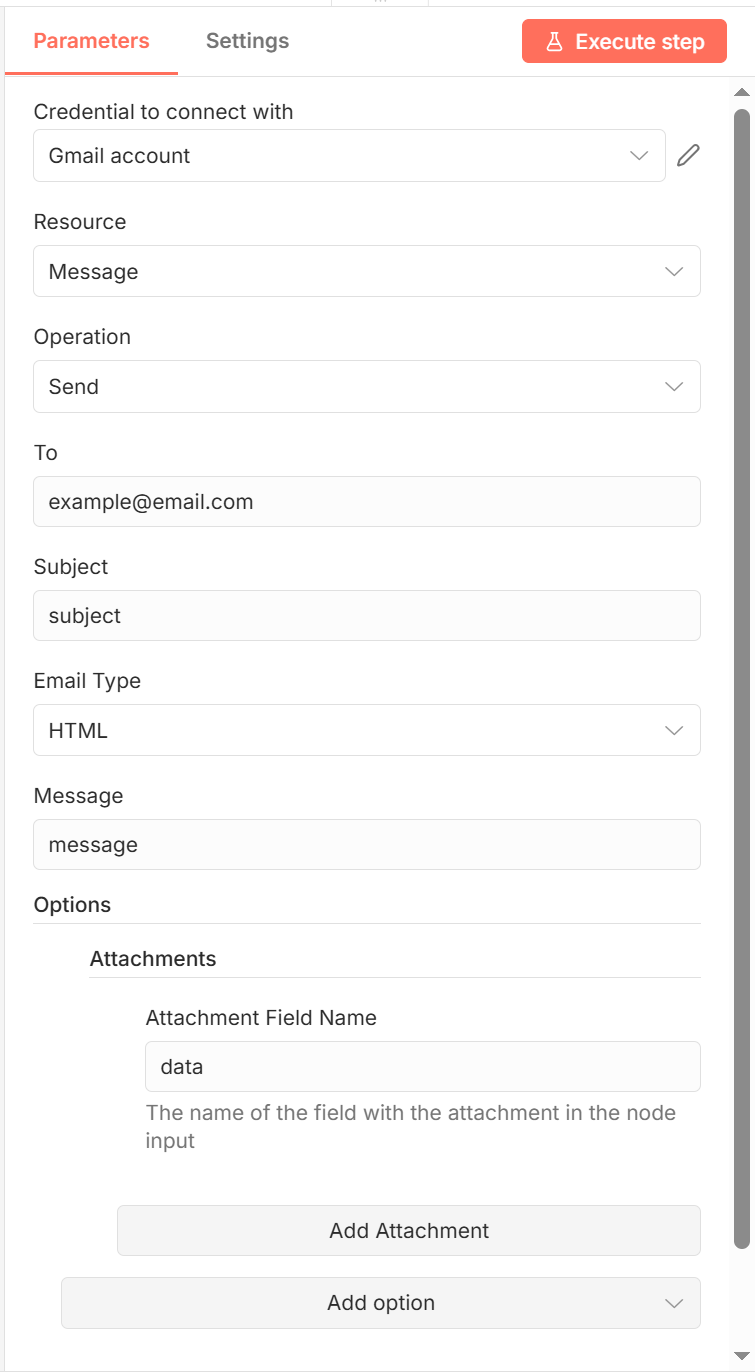
Finally, we will take the output of this HTTP Request node and send the PDF as an email attachment. Add a Gmail node (type: Send a Message) next in the workflow. Set the Credential to connect with to Gmail account. Set the Resource to Message, the Operation to Send. Set the specifics of the email details as you wish, but to attach the rendered PDF Document, add an Attachments Option, with Attachment Field Name data.
Conclusion
And there we have it. A fully automated workflow to generate PDF documents from a LaTeX template and input data using LaTeXLite’s API, all within n8n. You can now modify the template and input data as required to generate different documents, and extend the workflow to suit your needs.
See the Docs for more code examples.
And to learn more about LaTeXLite’s API, and get set up with your own API key, visit our homepage here: LaTeXLite